
Blog 1: Laser Cutting
- darelsuen
- Nov 5, 2022
- 2 min read

Updated: Nov 6, 2022
The first practical of this module had me to learn about laser cutting as well as write a standard operating procedure (SOP) and operating a Universal laser cutter.
To begin, let's first look at the hazards associated to operating a laser cutter as well as their appropriate control measure. Hazard analysis is an important first step when it comes to engineering to ensure the safety of the engineers.
Hazards | Control Measures | Supporting Pictures |
Flare up caused by fume accumulation | Fumes are produced when cutting certain materials, causing debris and particulate matter to be produced and built up. These fumes could be flammable or cause pulmonary diseases
|  |
Cracking of focus lens in laser cutter | The lens of a laser cutter may crack when dirt is present on the lens and the laser is switched on
|  |
Laser Cutting Operation | When the laser cutter is in operation, the sparks produced are very bright and could cause eye damaged if looked at directly for a period of time
|  |
Fire breakout | A fire may occur if small particulate matter resulting from a cut is ignited
|  |
Next, let's look at what materials can be used for laser cutting in our FabLab.
Material | Photo |
Cardboard |  |
Paper |  |
Acrylic |  |
Wood |  |
Below are the materials that cannot be cut
Material | Photo |
Metal |  |
PVC |  |
Foam |  |
Rubber |  |
Now, lets look at how to operate the Universal Laser Cutter in FabLab.
Section 1: File Importing & CorelDraw Usage
|  |
2. Find the 'Pen' tool at the bottom right of the interface and double click the colored box to open a menu. To Cut:
To Engrave: Find the 'bucket' tool on the interface and double click the colored box on the side to open a menu
For engrave: - Images must be converted to greyscale - Via Bitmaps > mode > Greyscale - Ensure black is in RAST Mode in print - On clear acrylic, color must be inverted - Via Effects > Transform > Invert Colors |    |
Section 2: Universal Laser Cutter, Air Compressor, Fume Extractor Start-Up
3. Switch on the power for the laser cutter, fume extractor and air compressor |  |
Section 3: Laser Cutting Job
4. Click on File > Print |  |
5. Click on the cogwheel icon of the Print Menu |  |
6. Click on the 'LOAD' button on the Universal Material Setting |  |
7. Select the preset material that matches the material type and thickness of the material to be cut and then select 'Open' |  |
8. Click 'Ok' on the Universal Material Settings |  |
9. Click 'Print' on the print menu | 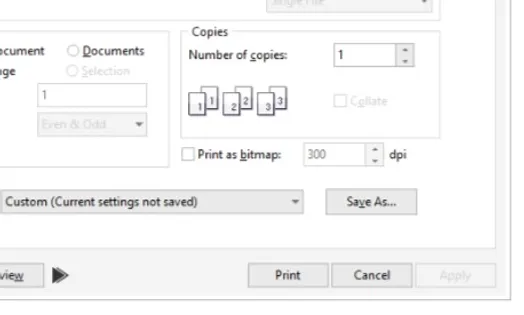 |
10. Open the Universal Control Panel (UCP) by clicking on the icon on the taskbar |  |
Activate the laser cutter by clicking the red button |  |
Use the 'Focus' tool on the UCP and point the laser to every corner of the desired cutting area as shown on the UCP. Check that the laser is within cuttable material in the machine |  |
Close the lid of the laser cutting machine and click the 'Play' button on the UCP |  |
Now to the Dos & Don'ts of Laser Cutting
DOs •Ask someone certified to watch the cutter or switch it off if you are leaving for a period of time
•Follow the steps to extinguish a fire on the SOP when a fire occurs
•Perform housekeeping at the end of every session |  |
DONTs •Do not stare into the beam while cutting
•Do not use materials that contains Chlorine (e.g. PVC) or Foam
•Do not cut or engrave Metal materials
•Do not leave machine unattended while cutting/engraving |  |
REFLECTION
The entire laser cutting experience has been a very insightful one. Before the test, I was very nervous as it was my first time using the laser cutter. Although there were materials in Brightspace provided, I would have felt more comfortable if I had first hand experience in using the laser cutter before the test. However, the test itself went rather smoothly. The small error I had made was that I forgot to turn the laser cutter on before engaging the 'focus' tool. Thankfully, it was a small error and nothing catastrophic.
During the practical itself, though I was nervous, the assessor gave us a quick crash course on how to use the laser cutter. I was quite pleased to find that what I had written in my SOP was exactly what he had said.
Overall, the experience has been very enjoyable. I can now book a laser cutter in FabLab which would be a great asset in my Capstone Project. The knowledge I gain could be beneficial in further studies should I choose to pursue engineering in the future.


Comments